Master Airtable Interface Designer: Build Inventory in 60 Minutes
Mastering Airtable Interface Designer allows users to rapidly build a custom inventory tracking system in under 60 minutes, streamlining operations and enhancing data visibility without complex coding.
Have you ever wished for a simpler way to manage your inventory, without the headache of complex software or endless spreadsheets? The good news is that with Airtable Interface Designer, building a custom inventory tracking system in under 60 minutes is not just a dream, it's an achievable reality. This guide will walk you through the process, making robust inventory management accessible to everyone.
Understanding Airtable and its Interface Designer
Airtable stands out as a versatile cloud collaboration service that masterfully blends the simplicity of a spreadsheet with the power of a database. It allows users to organize anything from project management to content calendars, but its true potential often shines brightest when tackling structured data challenges like inventory. Traditional spreadsheets can quickly become cumbersome and prone to errors when dealing with dynamic inventory data. Airtable, however, provides a more robust and flexible foundation, allowing for linked records, rich field types, and a more intuitive data structure.
The Interface Designer, a relatively newer but incredibly impactful feature within Airtable, elevates this functionality by enabling users to create custom, tailored interfaces on top of their existing bases. Think of it as building a personalized control panel for your data. Instead of navigating raw tables, you can design a visual workspace that displays only the most relevant information and offers specific actions, making data interaction significantly more user-friendly and efficient. This capability is particularly transformative for inventory management, where different team members might need to view or update specific aspects of stock without being overwhelmed by the entire database.
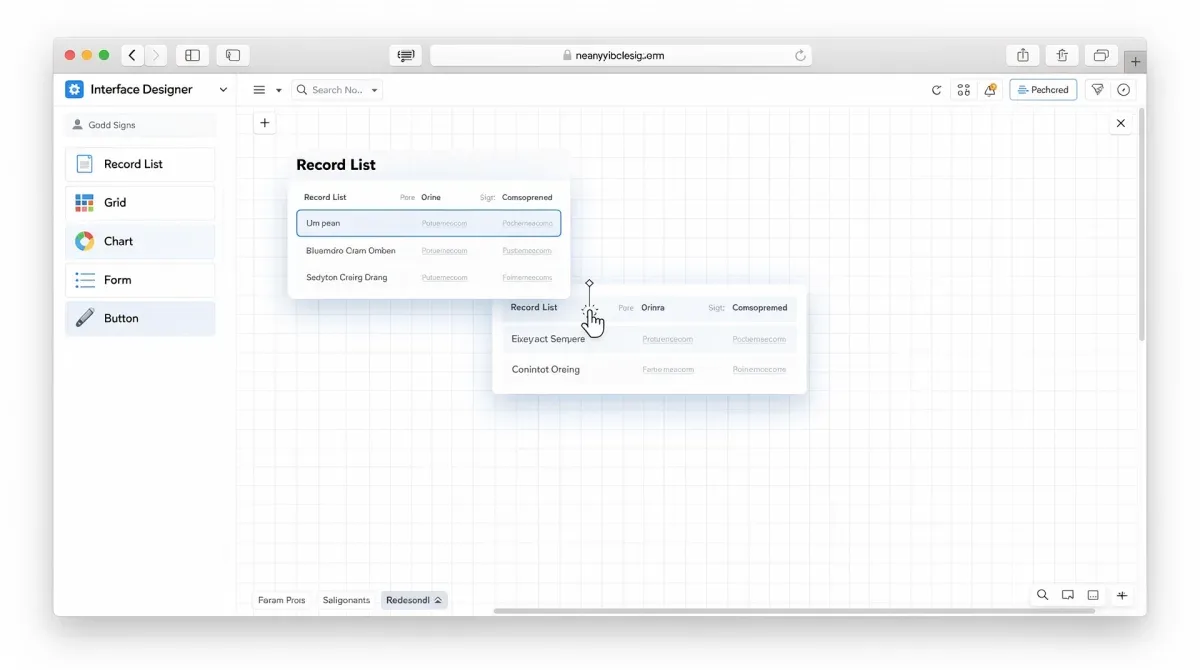
The beauty of the Interface Designer lies in its no-code approach. You don't need to be a developer to create sophisticated interfaces. Its drag-and-drop functionality means anyone can arrange elements like record lists, forms, charts, and buttons to craft an interface that perfectly suits their workflow. This democratizes the creation of powerful business tools, allowing small businesses, startups, and even individual departments within larger organizations to build bespoke solutions without relying on IT resources or expensive custom software development.
Why traditional inventory methods fall short
Many businesses still rely on rudimentary methods for inventory tracking, often encountering significant hurdles. These traditional approaches, while seemingly straightforward at first, quickly reveal their limitations as operations grow.
- Manual Data Entry Errors: Human error is inevitable with manual input, leading to inaccuracies in stock counts, misplaced items, and incorrect order fulfillment.
- Lack of Real-time Visibility: Spreadsheets don't update automatically across users, making it difficult to get an accurate, real-time picture of inventory levels, especially in dynamic environments.
- Scalability Issues: As product lines expand or sales volumes increase, simple systems struggle to keep up, becoming slow and unmanageable.
- Limited Reporting and Analytics: Extracting meaningful insights from basic data sets for forecasting or identifying trends is often a laborious and complex task.
These shortcomings can lead to significant financial losses due to overstocking, stockouts, and inefficient operations. A modern, adaptable system like one built with Airtable Interface Designer addresses these issues head-on, providing a foundation for scalable and accurate inventory management.

In conclusion, Airtable and its Interface Designer offer a compelling alternative to traditional, often inadequate, inventory management methods. By providing a flexible, visually driven, and no-code platform, it empowers users to create highly customized and efficient systems that cater precisely to their operational needs, setting the stage for a more organized and productive workflow.
Setting Up Your Airtable Base for Inventory Tracking
Before diving into the visual design of your interface, the foundation of any robust system in Airtable is a well-structured base. A base is essentially your database, comprising tables, fields, and records that hold all your inventory data. Thinking strategically about how your data is organized here will save you significant time and effort later when building your interface.
Start by creating a new base in Airtable. You can begin from scratch or use one of Airtable's inventory templates as a starting point, which can provide a useful framework to adapt. The key is to define your core tables and the relationships between them. For an inventory system, you'll typically need tables for Products, Suppliers, Orders, and perhaps Locations or Customers.
Each table should have fields that accurately capture the necessary information. For instance, your Products table might include fields for 'Product Name' (single line text), 'SKU' (single line text), 'Description' (long text), 'Current Stock' (number), 'Reorder Point' (number), 'Unit Cost' (currency), and 'Supplier' (a linked record field to your Suppliers table). The 'Current Stock' field is crucial and will often be updated dynamically through your interface.
Essential tables and fields for inventory
A well-designed Airtable base for inventory tracking typically includes several interconnected tables, each serving a specific purpose. This relational structure is fundamental to Airtable's power and flexibility.
- Products Table: This is the heart of your inventory. Fields might include Product Name, SKU, Description, Category (single select), Current Stock (number), Reorder Point (number), Unit Price (currency), and a Linked Record field to Suppliers.
- Suppliers Table: Details about your vendors. Fields such as Supplier Name, Contact Person, Phone, Email, and a Linked Record field to Products (showing which products they supply).
- Orders Table: Tracks incoming and outgoing stock. Fields could be Order ID, Order Date (date), Type (single select: Purchase/Sale), Status (single select: Pending/Completed), Linked Record to Products (multiple records if an order has several items), Quantity (number), and Total Cost (currency, often a formula field).
- Locations Table (Optional but Recommended): If you have multiple storage locations. Fields like Location Name, Address, and a Linked Record field to Products (indicating where products are stored).
Establishing these relationships early on is critical. For example, linking a product to a supplier means you can easily see all products from a specific supplier or identify the supplier for any given product directly from your records. This interconnectedness is what makes Airtable so powerful for managing complex data sets.
Once your tables and fields are set up, populate them with some initial data. This step is important not only for having a functional base but also for testing your interface design later. Even a few sample records in each table will allow you to see how your interface elements will display and interact with real data, making the design process more intuitive and effective.
In summary, a thoughtfully constructed Airtable base forms the backbone of an efficient inventory system. By carefully defining your tables, fields, and their relationships, you create a robust data repository that is ready to be transformed into a user-friendly interface, ensuring accuracy and ease of management for all your inventory needs.
Designing Your First Interface: The Inventory Dashboard
With your Airtable base meticulously structured, it's time to bring your inventory data to life with the Interface Designer. The goal is to create a dashboard that provides a clear, actionable overview of your inventory, making it easy for anyone to understand stock levels and identify immediate needs. This initial interface will serve as your central hub for monitoring and managing stock.
Navigate to the 'Interfaces' section within your Airtable base and click 'Start building.' You'll be presented with a blank canvas and a palette of elements on the left. Think about what information is most critical at a glance. For an inventory dashboard, key elements often include a list of products, current stock levels, items below reorder point, and perhaps some summary statistics.
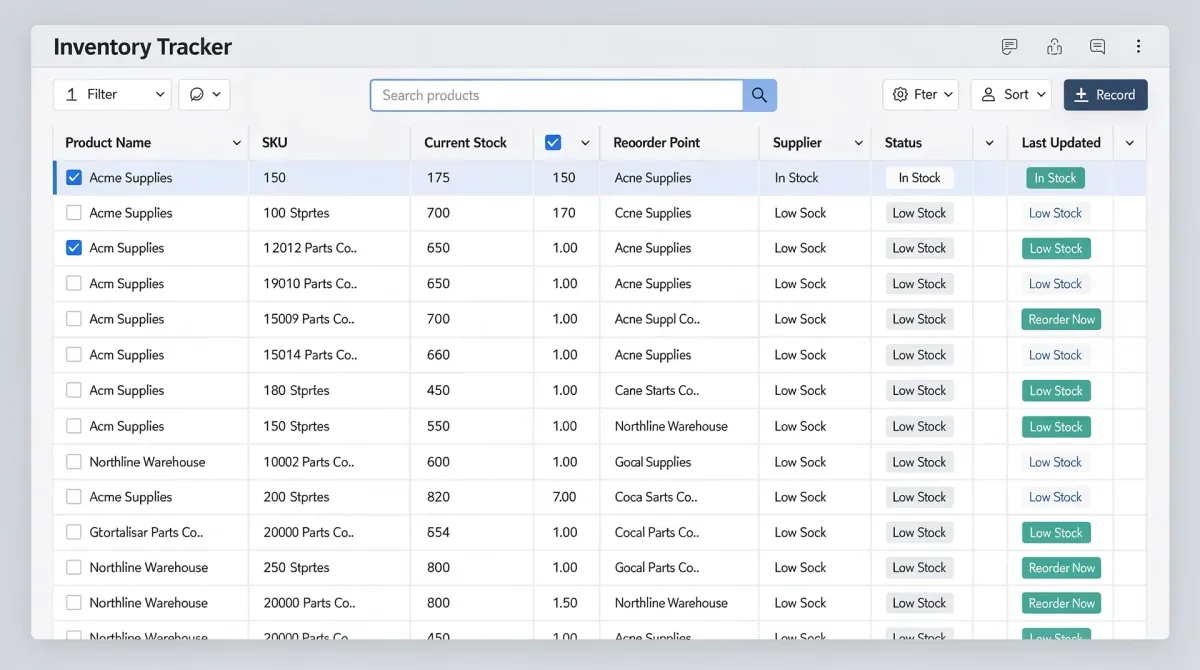
Begin by adding a 'Record list' element to display your products. Configure it to show essential fields like 'Product Name,' 'SKU,' and 'Current Stock.' You can also add filters to this list, for example, to only show products that are currently in stock or those that are low. This immediate filtering capability is one of the strengths of Interface Designer, allowing users to focus on what matters most.
Adding key elements and data visualizations
The power of the Interface Designer lies in its ability to present data in engaging and digestible ways. Beyond simple lists, incorporating various elements can significantly enhance your inventory dashboard.
- Record List for All Products: Display a comprehensive list of all your products, with customizable fields and sorting options. This acts as your main inventory overview.
- Filtered Record List for Low Stock: Create a separate record list, specifically filtered to show only products where 'Current Stock' is less than or equal to 'Reorder Point.' This provides an immediate alert for items needing attention.
- Number Elements for Summaries: Add individual 'Number' elements to display aggregate data, such as 'Total Unique Products,' 'Total Stock Value,' or 'Number of Low Stock Items.' These provide quick, high-level insights.
- Chart Elements for Trends: If you have historical data, use 'Chart' elements (e.g., bar charts, pie charts) to visualize stock distribution by category or track inventory changes over time.
- Button Elements for Actions:1 Implement 'Button' elements to trigger actions like 'Add New Product' (opening a form) or 'Update Stock' (linking to a specific record).
Arranging these elements logically on your canvas is crucial for usability. Group related information together and use clear headings. Remember that the goal is to create an intuitive experience where users can quickly find the information they need and take appropriate action without extensive searching or clicking. Experiment with different layouts and element sizes to achieve a balanced and aesthetically pleasing design.
As you build, continuously test your interface. Click through the elements, check if the data displays correctly, and ensure filters and buttons work as intended. This iterative process of designing and testing will help you refine your dashboard and ensure it meets the practical needs of your inventory management workflow. The first interface you design for your inventory dashboard will likely be one of the most used, offering a real-time pulse on your stock levels.
Building Custom Forms for Efficient Data Entry
While an inventory dashboard provides an excellent overview, efficient inventory management also requires streamlined processes for adding new products and updating existing stock. This is where custom forms built with Airtable Interface Designer become invaluable. They simplify data entry, reduce errors, and ensure consistency across your records, making the overall system much more user-friendly than directly editing tables.
To create a new form, you'll typically start a new interface page or add a new layout within an existing interface. Select the 'Form' element from the sidebar and drag it onto your canvas. You'll then link this form to one of your tables, for example, your 'Products' table for adding new items, or your 'Orders' table for recording incoming or outgoing stock. The form will automatically populate with fields from the linked table, which you can then customize.
Customization is key here. You can choose which fields to include, rearrange their order, add help text, and even set default values. For instance, when adding a new product, you might want fields for 'Product Name,' 'SKU,' 'Description,' 'Category,' 'Unit Cost,' and 'Supplier.' For updating stock after a sale, a simpler form might just need 'Product,' 'Quantity Sold,' and 'Date of Sale.' The flexibility allows you to tailor forms precisely to specific tasks, making them intuitive for users.
Streamlining product addition and stock updates
Effective forms are designed to guide the user through the data entry process, minimizing confusion and maximizing accuracy. Consider the distinct workflows for adding new products versus updating stock levels.
- New Product Entry Form:
- Include all necessary fields for a new product, such as Name, SKU, Description, Category, Reorder Point, and Supplier.
- Use validation rules (where available) to ensure data integrity, like making SKU a required field or ensuring 'Unit Cost' is a number.
- Add a 'Submit' button that creates a new record in your Products table upon completion.
- Stock Update Form (e.g., for receiving goods):
- Start with a 'Record Picker' element allowing users to easily select the product being updated.
- Include a 'Number' field for 'Quantity Received' and a 'Date' field for 'Receipt Date.'
- Use an 'Automation' (configured within Airtable, but triggered by the form) to add the 'Quantity Received' to the 'Current Stock' of the selected product.
Designing separate forms for different actions—like adding a new product, recording a sale, or logging a return—ensures that each task has a focused and efficient input mechanism. This modular approach not only makes the interface easier to use but also reduces the likelihood of errors by presenting only relevant fields for the task at hand.
After creating your forms, integrate them into your main inventory dashboard or navigation. You might add a button on your dashboard labeled 'Add New Product' that, when clicked, navigates the user to your new product entry form. Similarly, a 'Receive Stock' button could lead to a stock update form. This seamless navigation ensures that all inventory-related tasks are accessible from a central, user-friendly interface.
In conclusion, custom forms are a cornerstone of an efficient inventory tracking system built with Airtable Interface Designer. By simplifying data entry and tailoring the input process to specific tasks, these forms significantly enhance usability, reduce errors, and ensure that your inventory data remains accurate and up-to-date, driving better operational decisions.
Automating Inventory Workflows for Maximum Efficiency
Building a custom inventory system with Airtable Interface Designer isn't just about pretty dashboards and easy-to-use forms; it's also about leveraging Airtable's automation capabilities to make your system truly smart. Automations can handle repetitive tasks, send alerts, and update records automatically, significantly reducing manual effort and the potential for human error. This is where your inventory system moves from being merely functional to being highly efficient.
Airtable's automation feature allows you to set up triggers and actions. A trigger is an event that starts an automation, such as a record meeting certain conditions (e.g., 'Current Stock' falls below 'Reorder Point') or a new record being created (e.g., a new order). An action is what Airtable does in response, like sending an email, updating a record, or creating a new record in another table. Integrating these automations into your inventory system can transform how you manage stock.
Consider the common scenario of low stock. Manually checking stock levels and then remembering to reorder is time-consuming and prone to oversight. With Airtable automations, this process can be entirely automated. You can set up an automation that triggers when a product's 'Current Stock' field drops below its 'Reorder Point' field, instantly notifying the purchasing manager or generating a reorder request. This proactive approach ensures you never run out of critical items unexpectedly.
Setting up alerts and automated reorder processes
Automations are particularly powerful for managing critical inventory thresholds and streamlining the reordering process. Here are some key automations to consider for your inventory tracking system:
- Low Stock Alerts:
- Trigger: When a record (in the Products table) matches conditions: 'Current Stock' is less than or equal to 'Reorder Point'.
- Action: Send an email to the purchasing department or a specific team member, detailing the product, current stock, and reorder quantity.
- Action: Create a new record in an 'Reorder Requests' table, automatically populating product details and a 'Pending' status.
- New Order Confirmation:
- Trigger: When a new record is created in the 'Orders' table (for sales).
- Action: Send an email confirmation to the customer with order details.
- Action: Update the 'Current Stock' in the 'Products' table by subtracting the quantity sold.
- Supplier Follow-up Reminders:
- Trigger: At a scheduled time (e.g., daily), find records in 'Reorder Requests' where 'Status' is 'Pending' and 'Request Date' is older than 3 days.
- Action: Send an email reminder to the relevant supplier contact.
These examples illustrate how automations can drastically reduce manual intervention. By handling routine tasks automatically, your team can focus on more strategic aspects of inventory management, such as demand forecasting, supplier negotiations, and optimizing storage. The key is to identify repetitive actions in your current workflow and design automations to take them over.
When setting up automations, always test them thoroughly to ensure they function as expected and don't inadvertently create issues. Run through various scenarios, such as a product hitting its reorder point or a new order being placed, and verify that the intended actions occur. A well-tested automation pipeline is the backbone of a truly efficient and reliable inventory system, allowing your business to operate smoothly and respond quickly to changes in demand or supply.
Advanced Tips for Optimizing Your Inventory Interface
Once you have a functional inventory tracking system with a dashboard, forms, and basic automations, you can start exploring advanced features of Airtable Interface Designer to further optimize its performance and usability. The goal is to make your interface not just effective, but truly intuitive and powerful, catering to specific user roles and providing deeper insights into your inventory operations.
One powerful optimization is creating multiple interfaces or interface layouts for different user roles or specific tasks. For example, a warehouse manager might need a detailed interface showing current stock, storage locations, and incoming shipments, while a sales team member might only need to see product availability and pricing. By tailoring interfaces, you ensure each user sees only the information relevant to them, reducing clutter and improving focus.
Another advanced tip involves leveraging conditional visibility. This feature allows you to show or hide elements on your interface based on certain data conditions. For instance, you could configure a 'Reorder' button to only appear when a product's stock level is below its reorder point. This makes your interface dynamic and guides users towards relevant actions at the right time, preventing unnecessary clicks and confusion.
Implementing user roles and custom views
Tailoring the user experience is paramount for widespread adoption and efficient use of your inventory system. Custom views and user roles are critical components of this customization.
- Role-Based Interfaces:
- Design a 'Purchasing Manager' interface with access to supplier details, reorder forms, and low stock alerts.
- Create a 'Warehouse Team' interface focused on scanning barcodes (if integrated), updating received stock, and managing physical locations.
- Develop a 'Sales Team' interface that displays product availability, pricing, and allows for quick order creation without revealing sensitive cost data.
- Custom Views within Interfaces:
- Use 'Record List' elements with pre-set filters to create different views within a single interface, such as 'All Products,' 'In Stock,' 'Out of Stock,' or 'Seasonal Items.'
- Allow users to easily switch between these views, providing quick access to filtered data without having to manually apply filters each time.
- Integrated Analytics: Beyond basic charts, consider integrating third-party analytics tools (if your Airtable plan supports it) to pull more sophisticated inventory performance metrics directly into your interface.
Exploring integrations with other tools can also significantly enhance your inventory system. Airtable connects with thousands of applications via Zapier or Make (formerly Integromat), allowing you to automate tasks beyond Airtable's native capabilities. Imagine automatically pushing low stock alerts to a Slack channel, syncing order details with an e-commerce platform, or generating purchase orders in a PDF format when a reorder is triggered. These integrations extend the reach and power of your Airtable setup, creating a truly connected ecosystem.
Finally, continuously gather feedback from your users. The people who interact with the inventory system daily are your best resource for identifying areas for improvement. Airtable Interface Designer is flexible, allowing you to iterate and refine your interfaces over time. Small adjustments based on user feedback can lead to significant gains in efficiency and user satisfaction, ensuring your inventory tracking system evolves with your business needs.
Integrating Barcode Scanning for Faster Inventory Management
For many businesses, particularly those managing physical goods, manual data entry for inventory items can be a significant bottleneck and a source of errors. Integrating barcode scanning capabilities into your Airtable inventory tracking system, potentially through the Interface Designer, can dramatically speed up processes like receiving, picking, and shipping, while also improving data accuracy. This move transforms a manual, time-consuming task into a quick, efficient, and reliable operation.
While Airtable's native Interface Designer doesn't have a built-in barcode scanner, there are effective workarounds and integrations that can achieve this functionality. The most common approach involves using a dedicated barcode scanning app on a mobile device or a USB scanner connected to a computer, which then populates data into your Airtable base, often via a form or an automation. The key is to ensure your products have a unique identifier, such as a SKU or a dedicated barcode field, within your Airtable base.
When setting up your base for barcode scanning, ensure your 'Products' table includes a field specifically for 'Barcode' or 'SKU' (if your SKUs are scannable). This field should be a single line text type. When a barcode is scanned, the data captured will be matched against this field in your base to identify the product. This lookup process is fundamental to connecting the physical item with its digital record.
Leveraging mobile apps and external tools
To implement barcode scanning, you'll typically need to bridge Airtable with an external tool. Here are common strategies:
- Mobile Barcode Scanning Apps:
- Many mobile apps (e.g., Scan to Web, Sheetgo, or custom-built apps via platforms like Glide or AppGyver) can scan barcodes using your phone's camera.
- These apps can then be configured to send the scanned data directly to an Airtable form or an automation webhook, which then updates your inventory.
- This allows for on-the-go inventory updates from anywhere in your warehouse or store.
- USB Barcode Scanners with a Web Form:1
- For desktop-based operations, a simple USB barcode scanner can be used. When connected to a computer, these scanners typically act like a keyboard, inputting the scanned code into any active text field.
- You can create an Airtable form (via the Interface Designer or a standard Airtable form) with a single text field for 'Barcode/SKU.' When the barcode is scanned into this field, an automation can be triggered to look up the product and update its stock.
- Airtable Extensions and Custom Scripts:
- Explore Airtable Marketplace for extensions that might offer direct barcode scanning integration.
- For more advanced users, custom scripting within Airtable or external tools can create highly tailored barcode workflows.
Once the barcode data is captured and sent to Airtable, automations become critical. For example, when a barcode is scanned and matched to a product, an automation can increment the 'Current Stock' for incoming goods, or decrement it for outgoing items. You can also use automations to record the time and date of the scan, the user who performed it, and the type of transaction (e.g., 'received,' 'shipped,' 'returned'), providing a comprehensive audit trail.
Integrating barcode scanning might require a bit more setup than other aspects of the Interface Designer, but the efficiency gains are substantial. It significantly reduces manual errors, speeds up inventory movements, and provides real-time accuracy, which is invaluable for businesses with high inventory turnover or large product catalogs. The initial investment in setting up this functionality will pay dividends in improved operational efficiency and data reliability.
Maintaining and Evolving Your Inventory System
Building an inventory tracking system with Airtable Interface Designer is not a one-time project; it's an ongoing process of refinement and adaptation. As your business grows and its needs change, your inventory system should evolve with it. Regular maintenance and a proactive approach to updates will ensure that your system remains effective, efficient, and relevant, continuing to serve as a valuable asset for your operations.
The first aspect of maintenance involves regularly reviewing your data for accuracy and consistency. Even with automations, occasional discrepancies can arise. Schedule periodic checks to compare physical inventory counts with your Airtable records. This helps identify any process gaps or data entry errors that might have slipped through and allows you to address them promptly, maintaining the integrity of your stock information.
Another crucial element is gathering feedback from your users. The people who interact with the system daily—whether it's the warehouse team, sales staff, or purchasing managers—are the best source of insights into what's working well and what could be improved. Their practical experience can highlight bottlenecks, suggest new features, or point out areas where the interface could be made more intuitive. This continuous feedback loop is vital for iterative improvement.
Adapting to business growth and new challenges
Your business environment is dynamic, and your inventory system must be agile enough to adapt. Here's how to ensure it remains robust:
- Regular Performance Reviews:
- Periodically review the performance of your automations and interfaces. Are they running smoothly? Are there any errors or delays?
- Check if your base structure still accurately reflects your inventory processes or if new product lines or suppliers require additional fields or tables.
- User Training and Documentation:
- As you make updates or onboard new team members, ensure comprehensive training is provided.
- Maintain up-to-date documentation for your system, including how to use different interfaces, forms, and troubleshoot common issues.
- Scalability Planning:
- Anticipate future growth. If you expect a significant increase in inventory volume or new warehouses, consider how your current Airtable plan and base structure can accommodate this.\
- Explore Airtable's advanced features or consider splitting large bases if performance becomes an issue.
Security and access control also play a vital role in maintaining a robust system. Regularly review who has access to your Airtable base and interfaces, and ensure permissions are set appropriately for different user roles. This protects sensitive inventory data and prevents unauthorized modifications, safeguarding the integrity of your information.
Finally, don't be afraid to experiment with new Airtable features as they are released. Airtable is continuously evolving, and new functionalities in the Interface Designer or automations can offer new ways to enhance your inventory management. Staying informed about these updates and being willing to integrate them can keep your system at the cutting edge, ensuring it continues to provide maximum value to your business for years to come.
| Key Aspect | Brief Description |
|---|---|
| Base Setup | Structure tables (Products, Suppliers, Orders) and fields to hold all inventory data efficiently. |
| Interface Design | Create custom dashboards and forms using drag-and-drop elements for clear data visualization and entry. |
| Automations | Set up triggers for low stock alerts, reorder processes, and automatic stock updates to boost efficiency. |
| Optimization | Tailor interfaces for different user roles, integrate barcode scanning, and continuously refine based on feedback. |
Frequently asked questions about Airtable inventory
What is Airtable Interface Designer and why is it useful for inventory?▼Airtable Interface Designer is a no-code tool allowing you to build custom visual interfaces on top of your Airtable data. For inventory, it's useful because it transforms raw data tables into intuitive dashboards and forms, making it easier for team members to view, update, and manage stock without navigating complex databases.
Can I integrate barcode scanning with my Airtable inventory system?▼Yes, while Airtable doesn't have a native scanner, you can integrate barcode scanning using external mobile apps or USB scanners. These tools capture barcode data and send it to your Airtable base, often via forms or automations, to quickly update product records and stock levels, enhancing accuracy and speed.
How do I set up automated low stock alerts in Airtable?▼You can set up an automation in Airtable to trigger when a product's 'Current Stock' field falls below its 'Reorder Point'. The action can be to send an email notification to a purchasing manager, create a new record in a 'Reorder Requests' table, or update a status field, ensuring timely replenishment.
Is Airtable suitable for large-scale inventory management?▼Airtable can handle significant inventory volumes, especially with a well-structured base and optimized interfaces. For very large-scale operations, consider performance implications, the number of records, and potential integrations. Its flexibility and automation capabilities make it a strong contender for many growing businesses.
What are the benefits of using custom forms in Airtable for inventory?▼Custom forms streamline data entry by presenting only relevant fields for specific tasks like adding new products or updating stock. This reduces errors, ensures data consistency, and makes the system more user-friendly, allowing team members to quickly and accurately input information without navigating complex tables.
Conclusion
Mastering Airtable Interface Designer empowers businesses to create a custom inventory tracking system in under 60 minutes, transforming complex data into actionable insights. By leveraging well-structured bases, intuitive interfaces, and powerful automations, organizations can achieve unparalleled efficiency, accuracy, and real-time visibility in their inventory management. This no-code solution not only simplifies operations but also provides a flexible, scalable framework that adapts to evolving business needs, ensuring a streamlined and error-free approach to stock control.
